Homemade Ayurvedic Face Packs for Glowing Skin
1. Marigold Face Pack for Glowing Skin:
Ever tried face masks with flowers?
It’s time you give it a shot. Genda or Marigold flowers are easily available. So just grab a few and make a fresh flowery paste with some raw milk and 1 tbsp. of honey. Apply this paste to your face and leave it on for 10-15 minutes before you wash it with lukewarm water.
Besides the amazing aroma, the pack also has antibacterial and antiseptic properties that heal the aggravated pimples or zits. Doing this for at least one or two times a week helps tighten the pores and leads to amazing glowing skin. This is a pefect ayurvedic face pack for oily skin.
Alternative:- You can use petals of absolute red roses in the same manner.
2. Turmeric and Besan Pack:
This is the most common homemade ayurvedic face pack for glowing skin used especially during the wedding season, as it helps to enhance the to-be wedded bride’s skin.
Mix 4 tbsp. of besan to half a tbsp. of turmeric powder and make a paste. You can also add some raw milk or malai for added smoothness. Use this at least once a week, for 10-15 minutes to get bright and glowing complexion.
Tip:
- Immediately wash your face once you see the face pack cracking.
- Dry face packs should not remain on the skin for long as it can bring forth fine lines and wrinkles.
3. Chandan or Sandalwood Mask:
To make this face mask, you can use the easily available sandalwood powder instead of grabbing a sandalwood stick and rubbing it on the stone. Both the alternatives do equal justice. Regardless of what you use, mix sandalwood with some water or rose water and apply it on the face for 15 minutes and wash it off. This is among the most popular of face packs for glowing skin.
The benefits of this face mask are that it reduces pimples, enhances the glow and makes the skin soft. Use it 5-6 times a week for better results.
4. Aromatic Facemask:
You can achieve this aromatic face mask by mixing the following ingredients.
- One small tbsp. of sandal wood paste
- 2 drops of rose oil
- 1 drop of lavender oil
- 2tbsp of besan
- A pinch of turmeric powder
- Mix it all with some malai or buttermilk
Ensure you leave the paste for at least 10-15 minutes and when used at least once a week, it relieves stress, thus giving your skin youthful glow.
5. Ayurvedic Scrub:
Make a scrub with 1 tbsp of fine rice flour and sandalwood powder. To it, add conch shell powder (optional –great for treating pimples), half a tbsp. of milk powder, and 1 tbsp of besan along with rose water. Use this ayurvedic scrub once or twice a week for a spa like scrubbing experience.
6. Honey and Lemon Mask :
This homemade ayurvedic face pack includes anti-oxidant and moisturizing properties, which helps you achieve clean and light skin. Take 1 tablespoon of organic honey and add 3-5 drops of fresh lemon juice and then apply on the face. Make sure to cover all areas of the face excluding the eye area. Rinse it off with clear water after 10-15 minutes. This pack will help you achieve soft, glowing skin in no time.
7. Herbal Pack :
Take some be san, a pinch of turmeric and a few drops of lemon along with raw milk or rose water to make a smooth pack. Apply on a thoroughly cleansed face and leave it for 10 minutes. Rinse it off with cold water to get a soft, smooth, and glowing skin. It also claims to fade away the blemishes along with removing tan and dead skin cells.
Important Tips:
- Keep your body hydrated. Drink lots of water to clear the skin from inside out.
- Avoid roaming in the sun too much. If it is necessary make sure to cover yourself properly with sunscreens and umbrellas.
- Avoid oily food.
- Follow a thorough daily skin care regimen.
Don’t forget to checkout our ultimate guide to beauty tips for face. Do share your tips and ideas with us in the comment section below.
Bulk Olive Oil and Wine

|
|
Acne is the biggest enemy for the youngster for their looks .We use lots of skin product for clear skin but we did not get it.In adolescence ,increase and rogens like testosterone, usually caused acne,which mostly found in during puberty.Acne is also found over the oil glands,It is also found in those persons who have allergy with dust or other chemical.
How Olive Oil Cure acne :- Olive Oil is not equal as the other oil ,it has some extra quality that’s help us for our skin problem,Olive Oil have the Vitamin D,vitamin E,vitamin K and contains Beta carotenes , which turns into Vitamin A in body. Vitamin A Stimulates genes that cause skin cells to mature and rise to the surface. This opens up the skin over pores.
8 Yoga Poses For Glowing Skin

Moisturizers, night creams, face packs, peel off masks, toners, massage creams, scrubbers and gels; everything is stacked up on your dressing table. Have I left out something ladies? These are all, right? We use these beauty products to get that wonderful glow. But needless to say, nothing has worked out yet. We keep wondering how on earth these Celebrities manage to keep the glow of their skin on for years. Magic or expensive cosmetics? No, the name of the magic is yoga. Yoga is the answer to all physical, mental and spiritual development.
Dull and loathsome skin besides being the result of external sources like unhealthy lifestyle also happens due to mental conditions like stress and unhappiness. It is easy for people when they say to throw away all stress but we alone know how difficult that is. Yoga helps out effectively when it comes to reducing stress and worries.
First we’ll give you some yoga exercise that will help you to calm your mind drop down all stress.
Yoga For Glowing Skin
1. Breathing exercise:
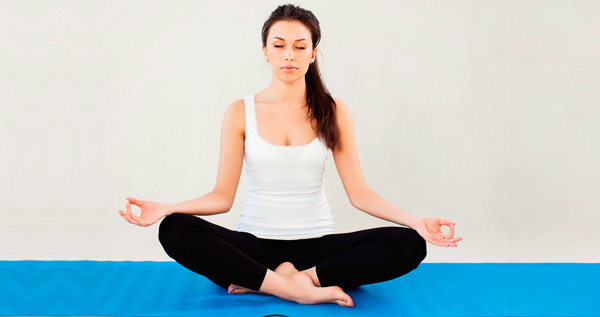
Control your breathing through counts that will rejuvenate your mind and that is what makes this pose of yoga for beautiful skin so popular.
- Sit on the floor with legs crossed.
- Close your eyes, relax and breathe normally.
- Now breathe in deeply through both nostrils with the count of 10.
- Hold your breath, again by counting 10.
- Count another 10 to release the breath.
- Practice this breathing technique for 5-10 minutes.
This breathing exercise will help you control your mind and you won’t get stressed out easily.
2. Shirshasana (Headstand):

Image: Shutterstock
Shirshasana is a bit difficult pose but is great if you want to maintain a long-lasting glow and healthy look in your face. Since you are standing on your head, blood starts flowing downwards, thereby improving blood circulation in your face. By reversing the flow of gravity, a headstand simulates a “face lift” by letting your skin hang in the opposite direction, which means getting rid of wrinkles. The inverted position of a headstand also flushes fresh nutrients and oxygen to the face, creating a glowing effect on the skin.
- Place a yoga mat on the floor. Beginners may use a few stacks of blanket or anything that is a bit soft and will give proper support to your head.
- Sit on the floor in kneel-down position. Remember your teachers punishing you asking you to kneel down. Keep your spine straight and keep your hands on your knees. Take a few normal breaths and relax.
- Next bring your hands in front of you on the mat or blankets (whichever you may be using), elbows on the floor and interlock your palms. See above picture.
- Next position your head in between your interlocked palms. Refer to the above picture. Be careful not to hurt yourself. Take a few relaxing breaths before we move on to the next step.
- Next try lifting up your body in a mountain position. Start with your knees, lift your hips and now you are supporting this position with your forearms, head and your toes. This is like a downward dog pose. See picture above. Balancing up till this position does take a lot of stamina, but with practice you will be able to do this. Balance yourself till this step and proceed again when you are totally comfortable with this pose.
- This step requires a bit more test of your balance. Now that you have partially balanced on your head, lifted up your hips and standing on your toes, try lifting up one leg off the floor slowly and steadily. To make it easier, walk your feet towards your head, unless your feet would naturally want to lift off.

- Now that you have lifted one leg, try lifting the other leg too. This will require a lot of strength on your arms and hand. But with practice, you’ll be able to master it. Beginners can ask friends to help them in balancing or you may also take support of the wall.
- To come down, bend your knees and curl down or bring down one leg and then the other as you had gone up.
- Relax in a kneel-down posture with some deep relaxing breaths.
3. Halasana (Plough pose):

Image: Shutterstock
- Lie down on your yoga mat straight and relaxed. Put your arms by your side with palms facing the floor.
- Now slowly lift up your legs from the floor such that a right angle is formed between your upper and lower torso. Push floor with your hands so that it gets easy for you to lift your legs. Breathe and relax.
- Next bring your legs more towards your upper torso and slowly lift your hips off the floor supporting and balancing yourself with your hands.
- Continue lifting your legs and bring it beyond your head as much as possible so as to touch the floor beyond your head with your toes.
- At this point, lift your back further so that now only your shoulder and your head is resting on the floor.
- Now your back has formed an arch. Straighten your spine and support the two sides of your waist with your hands, elbows on the ground. Breathe normally.
- Hold posture for 15-30 seconds before returning back to normal position.
Refer to the below picture for a clear step by step understanding.
This is one of the wonderful yoga asanas for glowing skin!
4. Dhanurasana (Bow pose):
In this asana, your body should pose like a bow.

Image: Shutterstock
- Lie down on your belly with hands by your side with palms facing upwards.
- Bend your knees to bring the heels near your buttocks.
- Now take your hands back and grasp your ankles. Rest your body weight on your abdomen.
- Now pull your ankles more with your hands. As your pull your ankles more, your upper torso automatically rises. And now your body looks like a bow.
- Keep your breathing normal.
5. Bharadvajasana (Twisted seated pose):

Image: Shutterstock
- Sit on the mat cross-legged with both hands extended on the mat on both your sides.
- Inhale deeply and strengthen your spine.
- Shifting your left hand from the mat place it on your right thigh and twist your torso to the right. Exhale when you twist your body.
- Hold this position for 30 seconds.
- Now turn your torso to your left while placing your right hand over your left thigh. Stay for another 30 seconds.
This asana of yoga for fair and glowing skin is great for anti-aging.
]
6. Sharvangasana (Shoulder stand):

Image: Shutterstock
This asana involves the whole body, hence the name Sharvanga.
7. Surya Namaskar (Sun Salutation):

Image: Shutterstock
The mother of all yoga asanas. Surya Namaskar involves 12 postures. (Link back to surya namaskar)
This yoga poses de-stresses, removes toxins and is a great relaxation exercise. So you can obviously expect your skin to glow if you practice this regularly.
8. Shavasana (Corpse pose):

Image: Shutterstock
- Lie down straight on the floor with your eyes closed.
- Relax thoroughly and throw out all negative thoughts and tension, be it your office pressure or any disturbance in your family. Think good and positive.
- Now, stand up straight and firm with your legs apart. Cover your face with your hands and take 10 quick breaths.
- Rub the skin on your eyes, forehead and face. Again take 10 quick breaths. Then rub entire face with your fingers. Breathe properly at the count of 10.
You’ll feel all your stress and tensions have disappeared. Technically Shavasana should be practiced after having done all yoga asanas. It is like a concluding asana for your yoga session.
Practice yoga, be happy and feel beautiful.